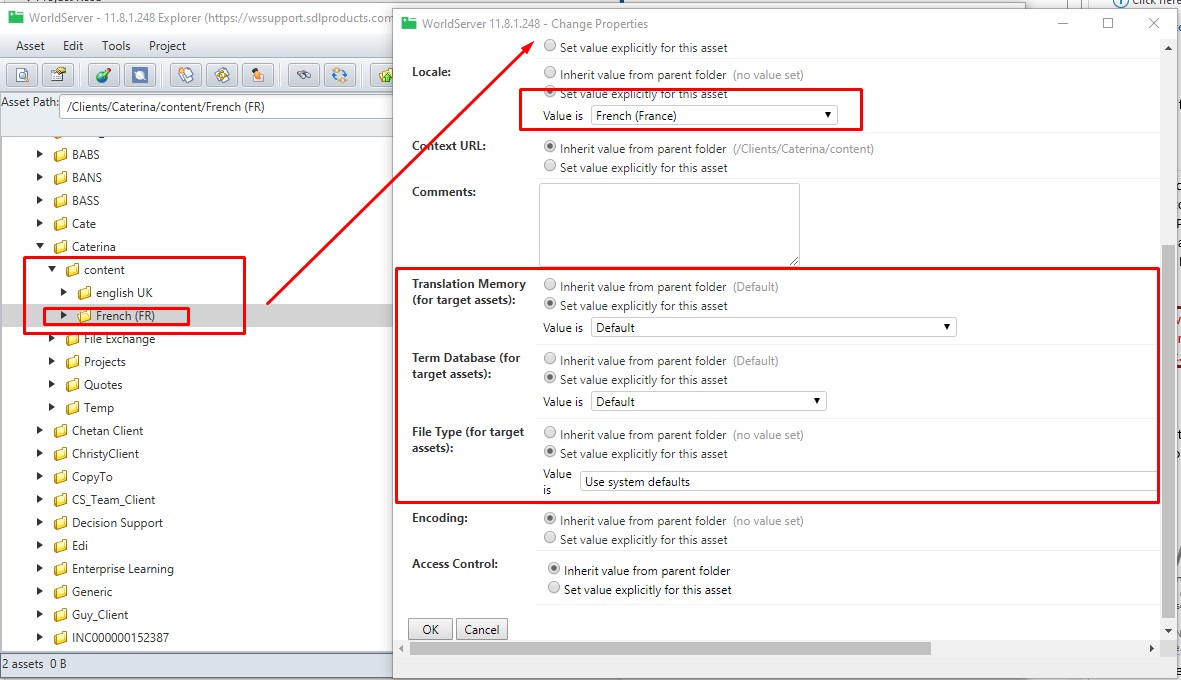
In order to create a new project In Explorer, a folder containing a subfolder associated with the source locale and a subfolder associated with the target language must exist, and the source locale folder must contain one or more source files.
Moreover, the Translation Memory, Term Database and File Types need to be set under the target language folder by right-clicking the target folder and selecting
Properties.

Finally, there must be a linkage between the source and target folder. This can be set manually by following the instructions in this
article.
While you can create these settings from scratch in Explorer by creating a new File directory/folder, alternatively, these settings are already set in existing project folders associated with active projects. Therefore, you can either create the folder manually or refer to an existing project folder and the respective source and target language folders and settings.
Once you know from which folder you want to create your new project from scratch, follow these steps:
1- Select the source file(s) from the source language folder of your choice.

2- In the Explorer Menu, go to
Project > Create Project3- The
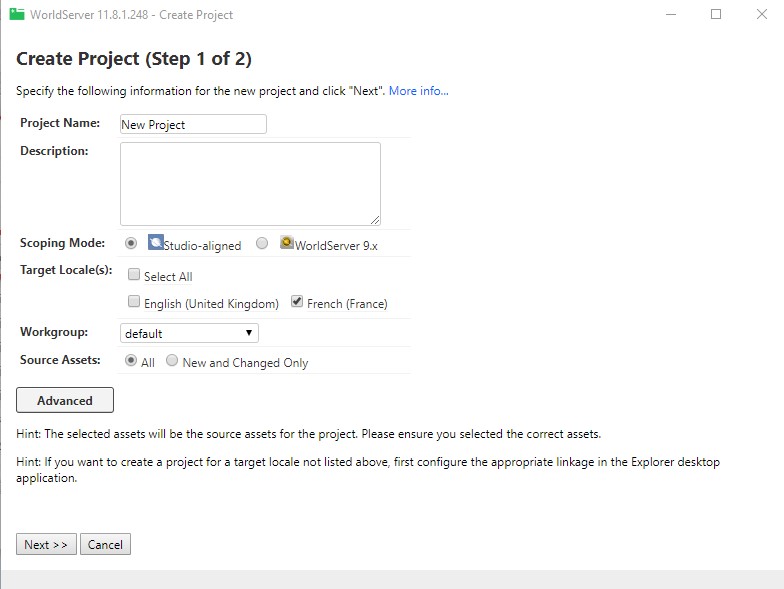
Create Project window will open up. Enter the project name, the scoping mode, the Workgroup and select the target locale(s)
4-
Source Assets: leave the pre-set
All5- If you click on the
Advanced button, you can set specific Project Attributes, if needed. Once done, click on
Next. Here is an example of Step 1 of the project creation:

6- After clicking on
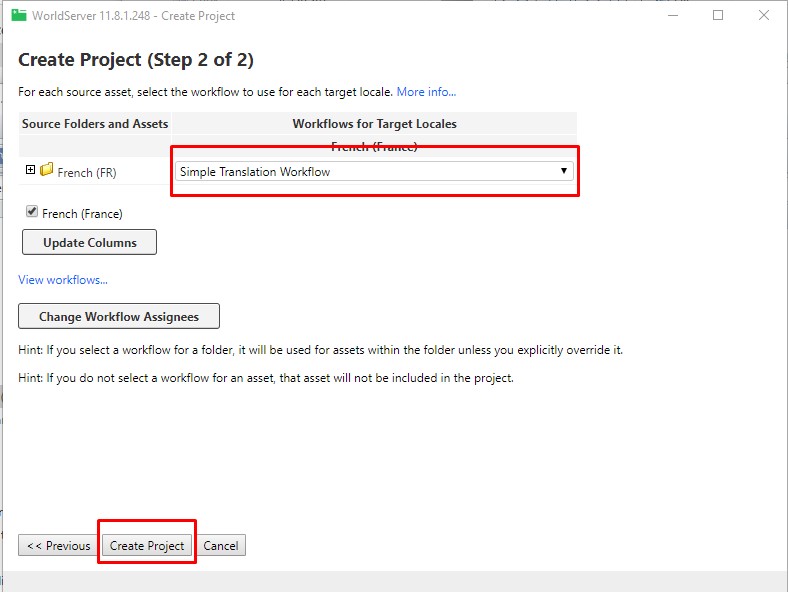
Next, Step 2 will appear. Now you need to select the Workflow that you want to apply to your project.
7- Click on
Create Project

8- Your project is created and you will find it in the Projects Page of the WorldServer User Interface. The directory/folder associated with your new project will be the one selected by you.


