Requirements
- A valid MultiTrans Expert license.
- The MultiTrans Client installed along with the MultiTrans XLIFF Editor.
Steps
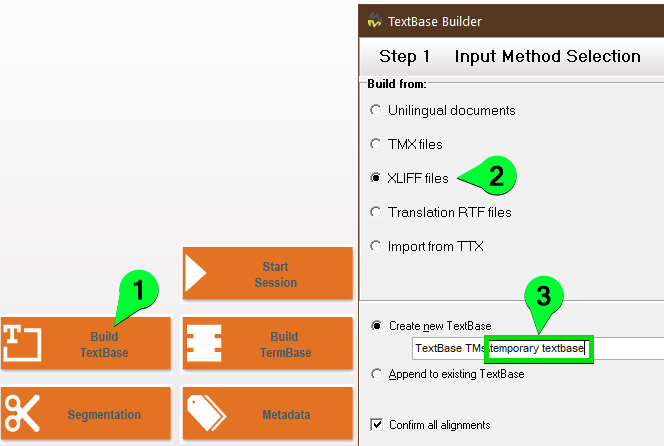
1. Open the MultiTrans Client then select
Build TextBase. Select
XLIFF files from the
Build from options, enter a name for the temporary TextBase then click
Next.
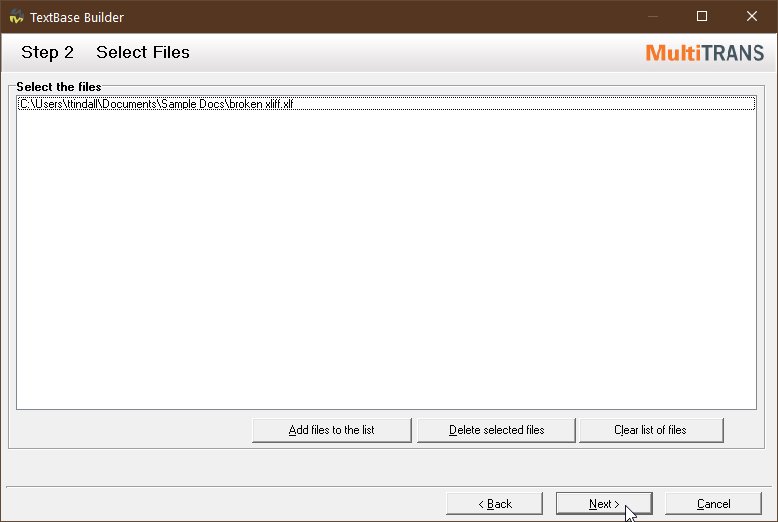
2. Add the faulty XLIFF file to the list then click
Next.
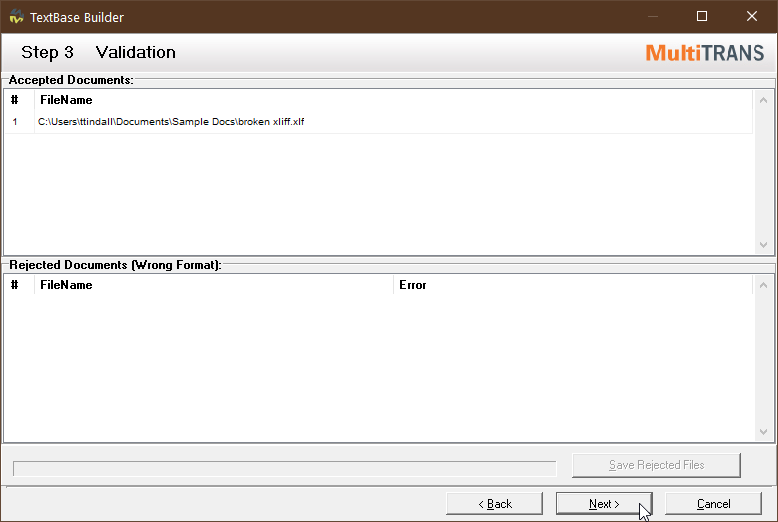
3. If the XLIFF file is
rejected at the validation step, create a support case via the
SDL Gateway and attach the XLIFF file to your case.
Otherwise if the file
accepted, click
Next.
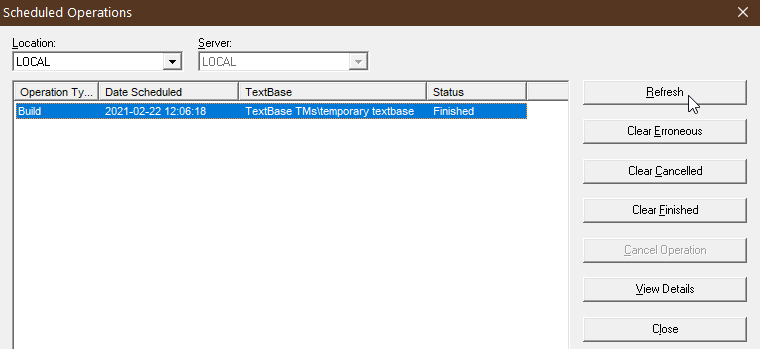
4. Click
Build then wait for the Build operation to complete. Click the
Refresh button in the Scheduled Operation to update the status.
5. Click
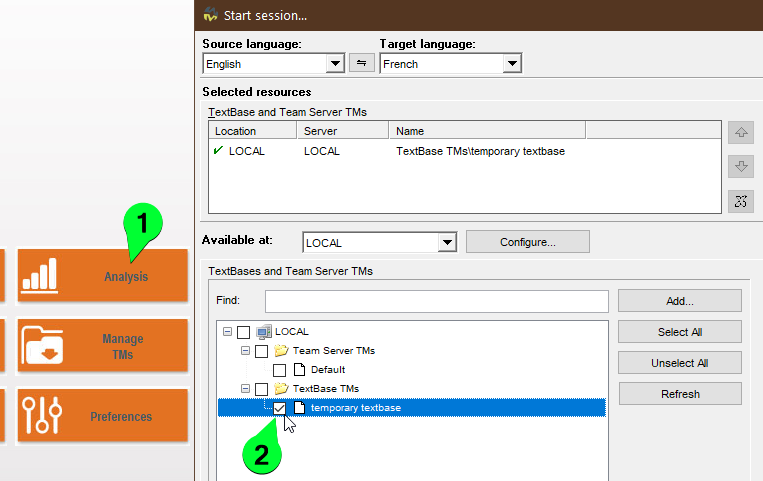
Analysis, select the new temporary TextBase and click
Start.
6. Make sure the
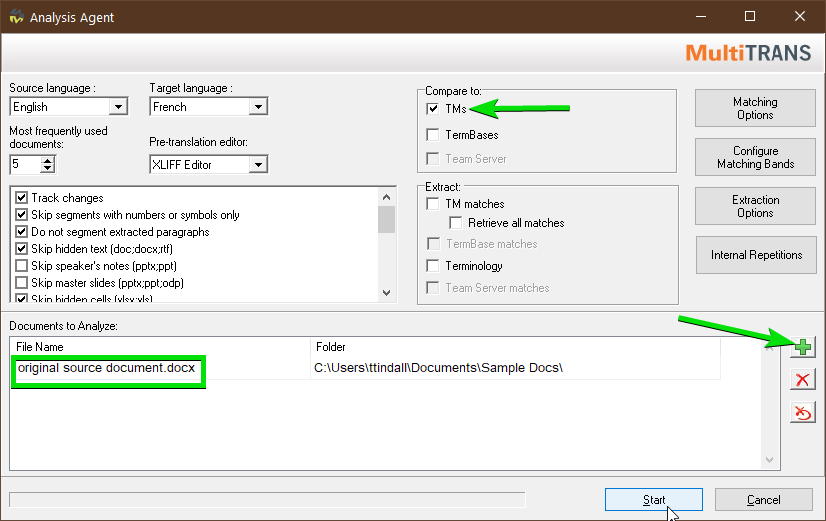
Compare to TMs option is selected and add the original
source document to the list of
Documents to Analyze. Then click
Start.
 Note:
Note: Make sure the
Pre-translation Editor option is set to
XLIFF Editor in order to create an XLF file. You can also select the "MS Office" option if you'd like to create the target Word or PowerPoint document instead.
Also make sure to adjust the import options to your needs (e.g. track changes, skip hidden text, do not segment paragraphs etc.)
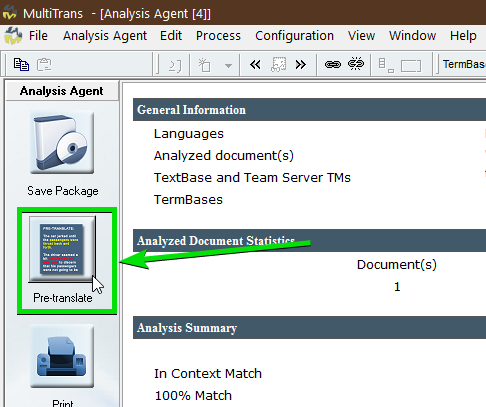
7. Click the
Pre-translate button on the left side then click
OK:
8. When the XLIFF Editor opens you will be prompted to select your options - you can always change these settings later. Click
OK and your new XLIFF file will open.