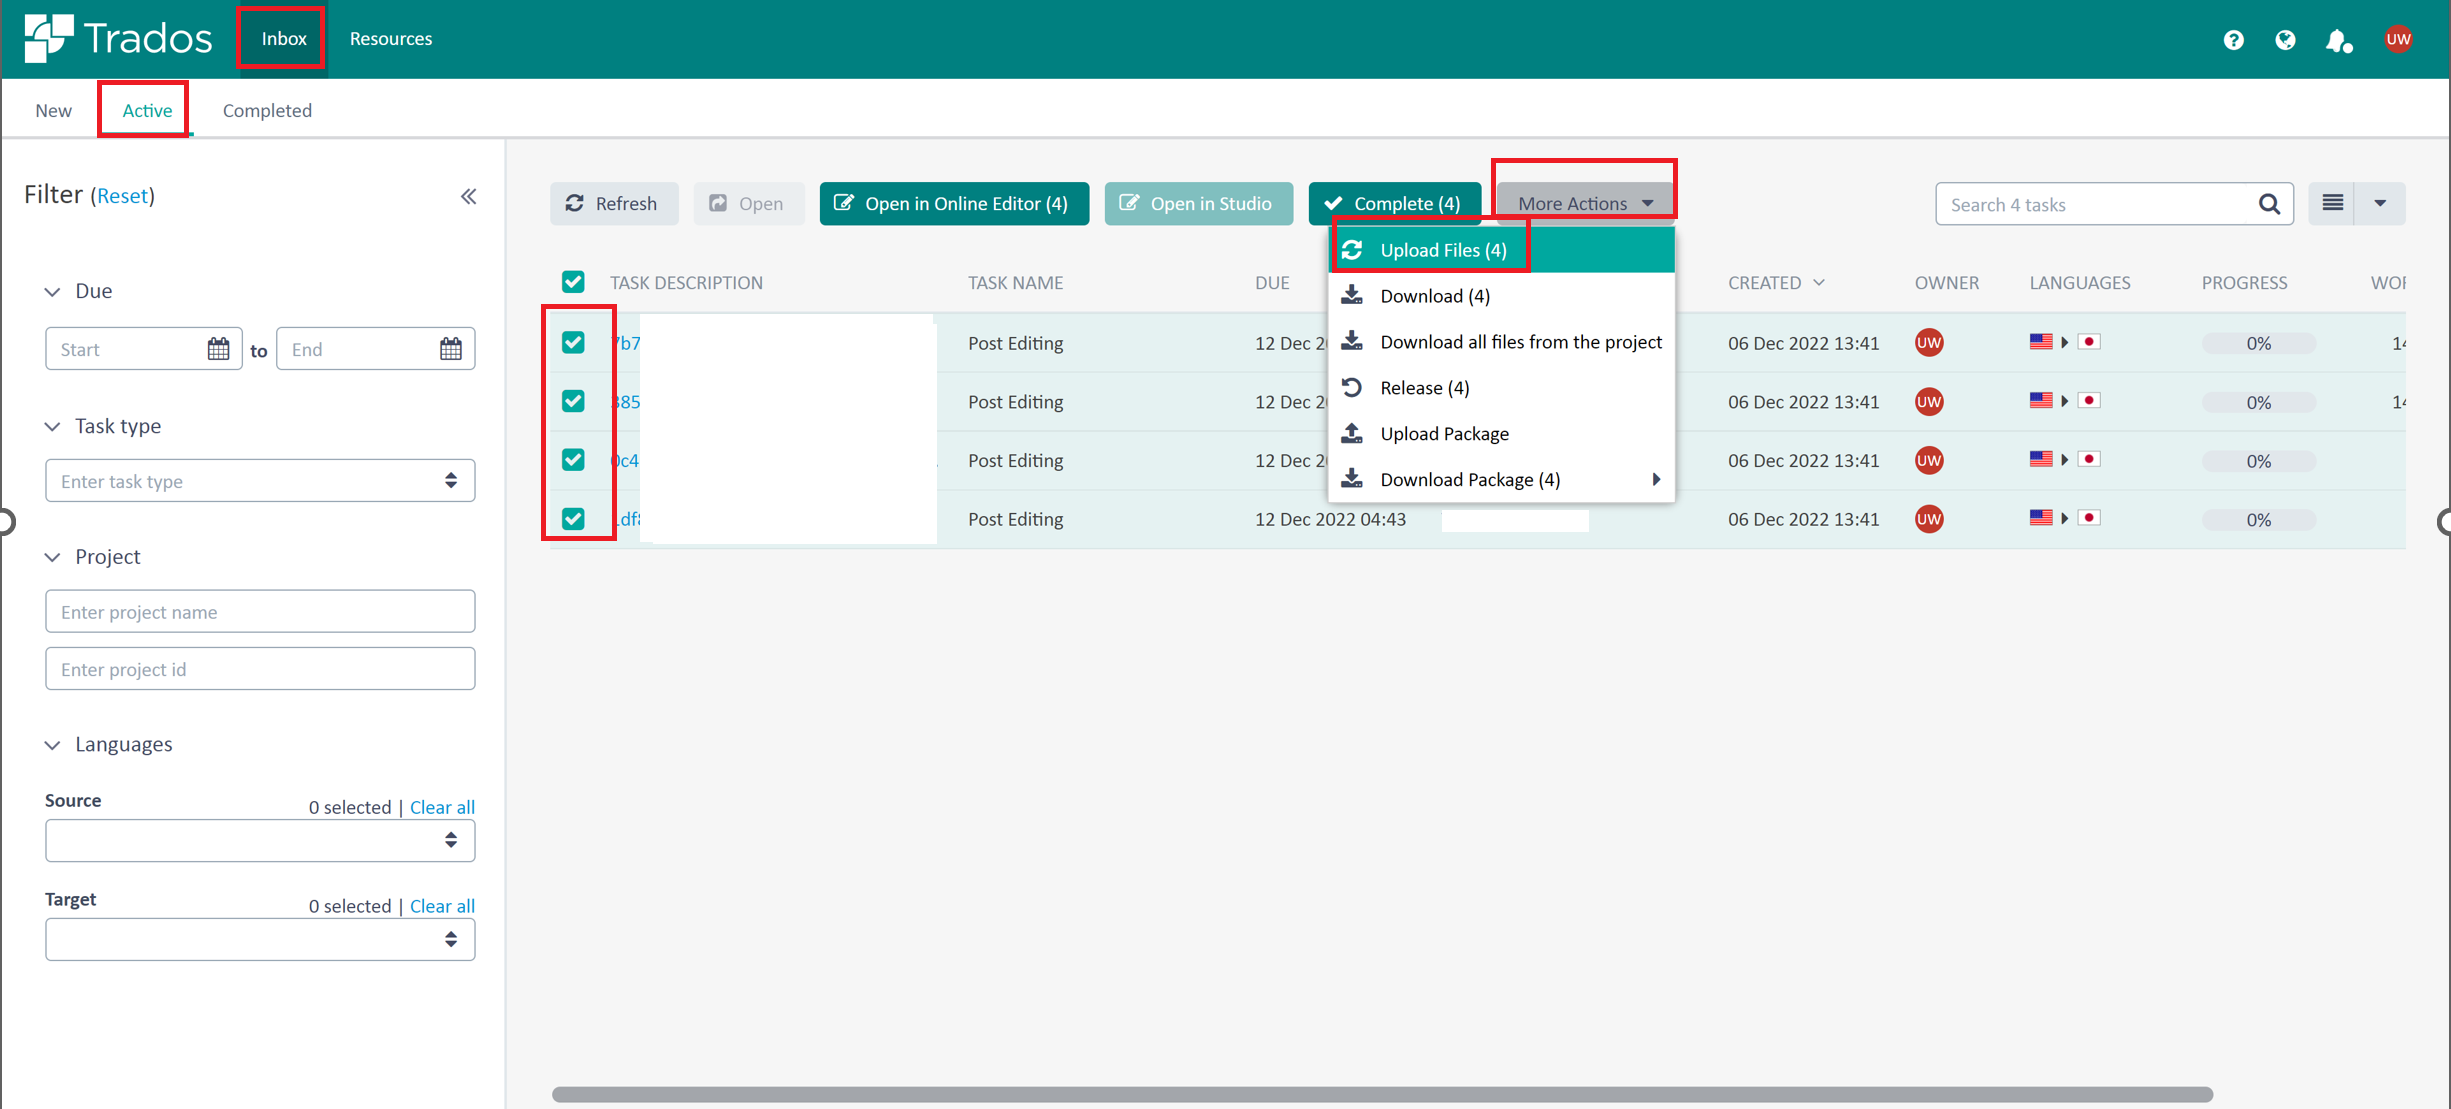
1.Once all the sdlxliff files are completed in Studio and ready to submit, accessing to "https://languagecloud.sdl.com"
Go to Inbox >Active, select relevant files then click on More Actions > Upload files as follows.
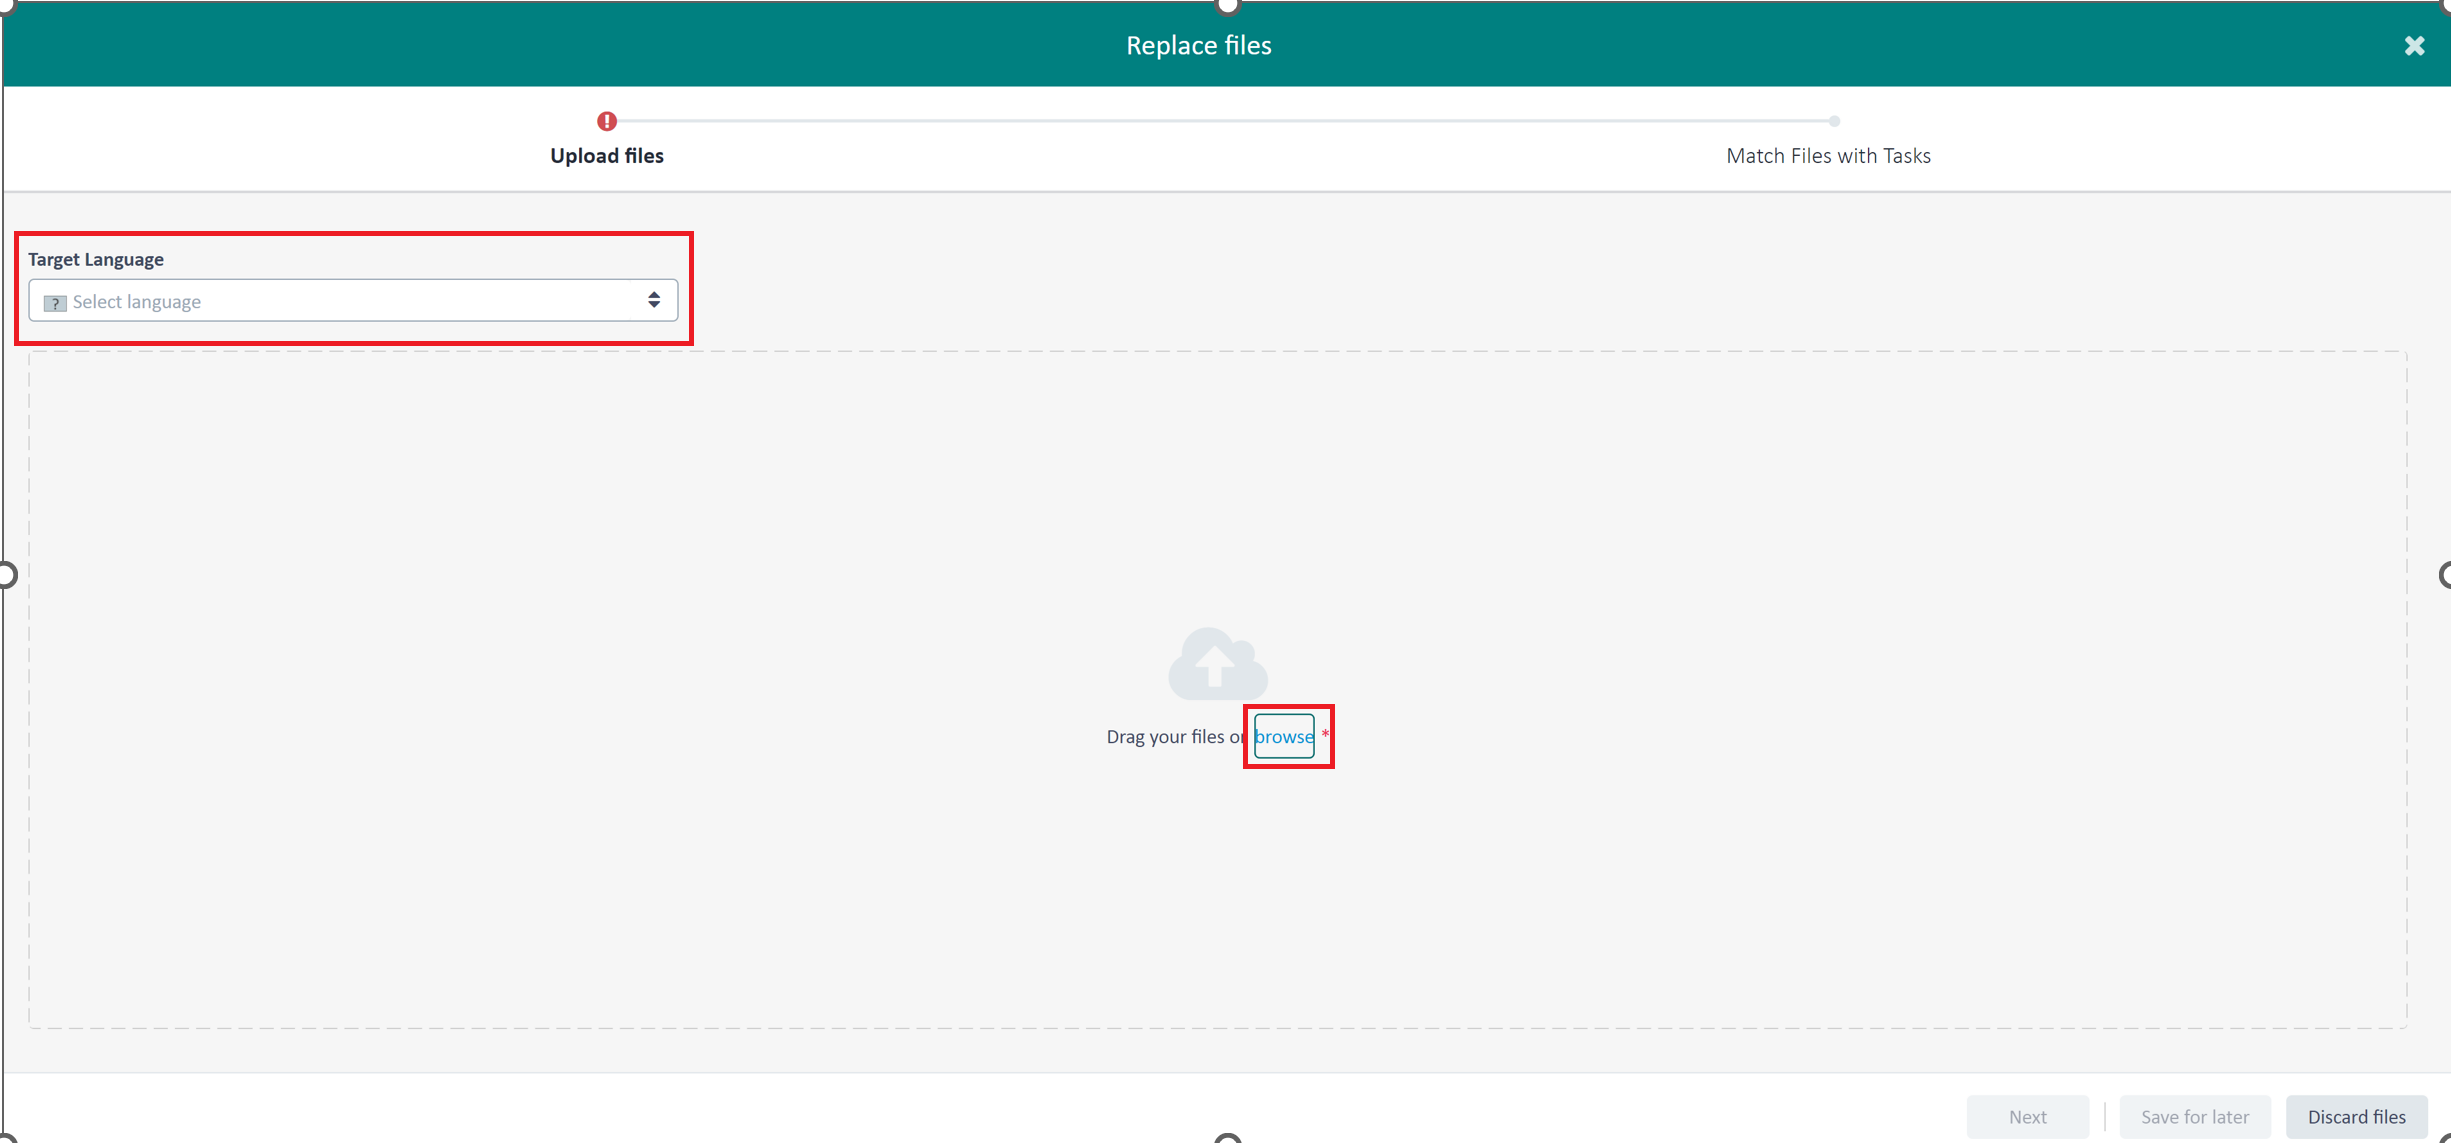
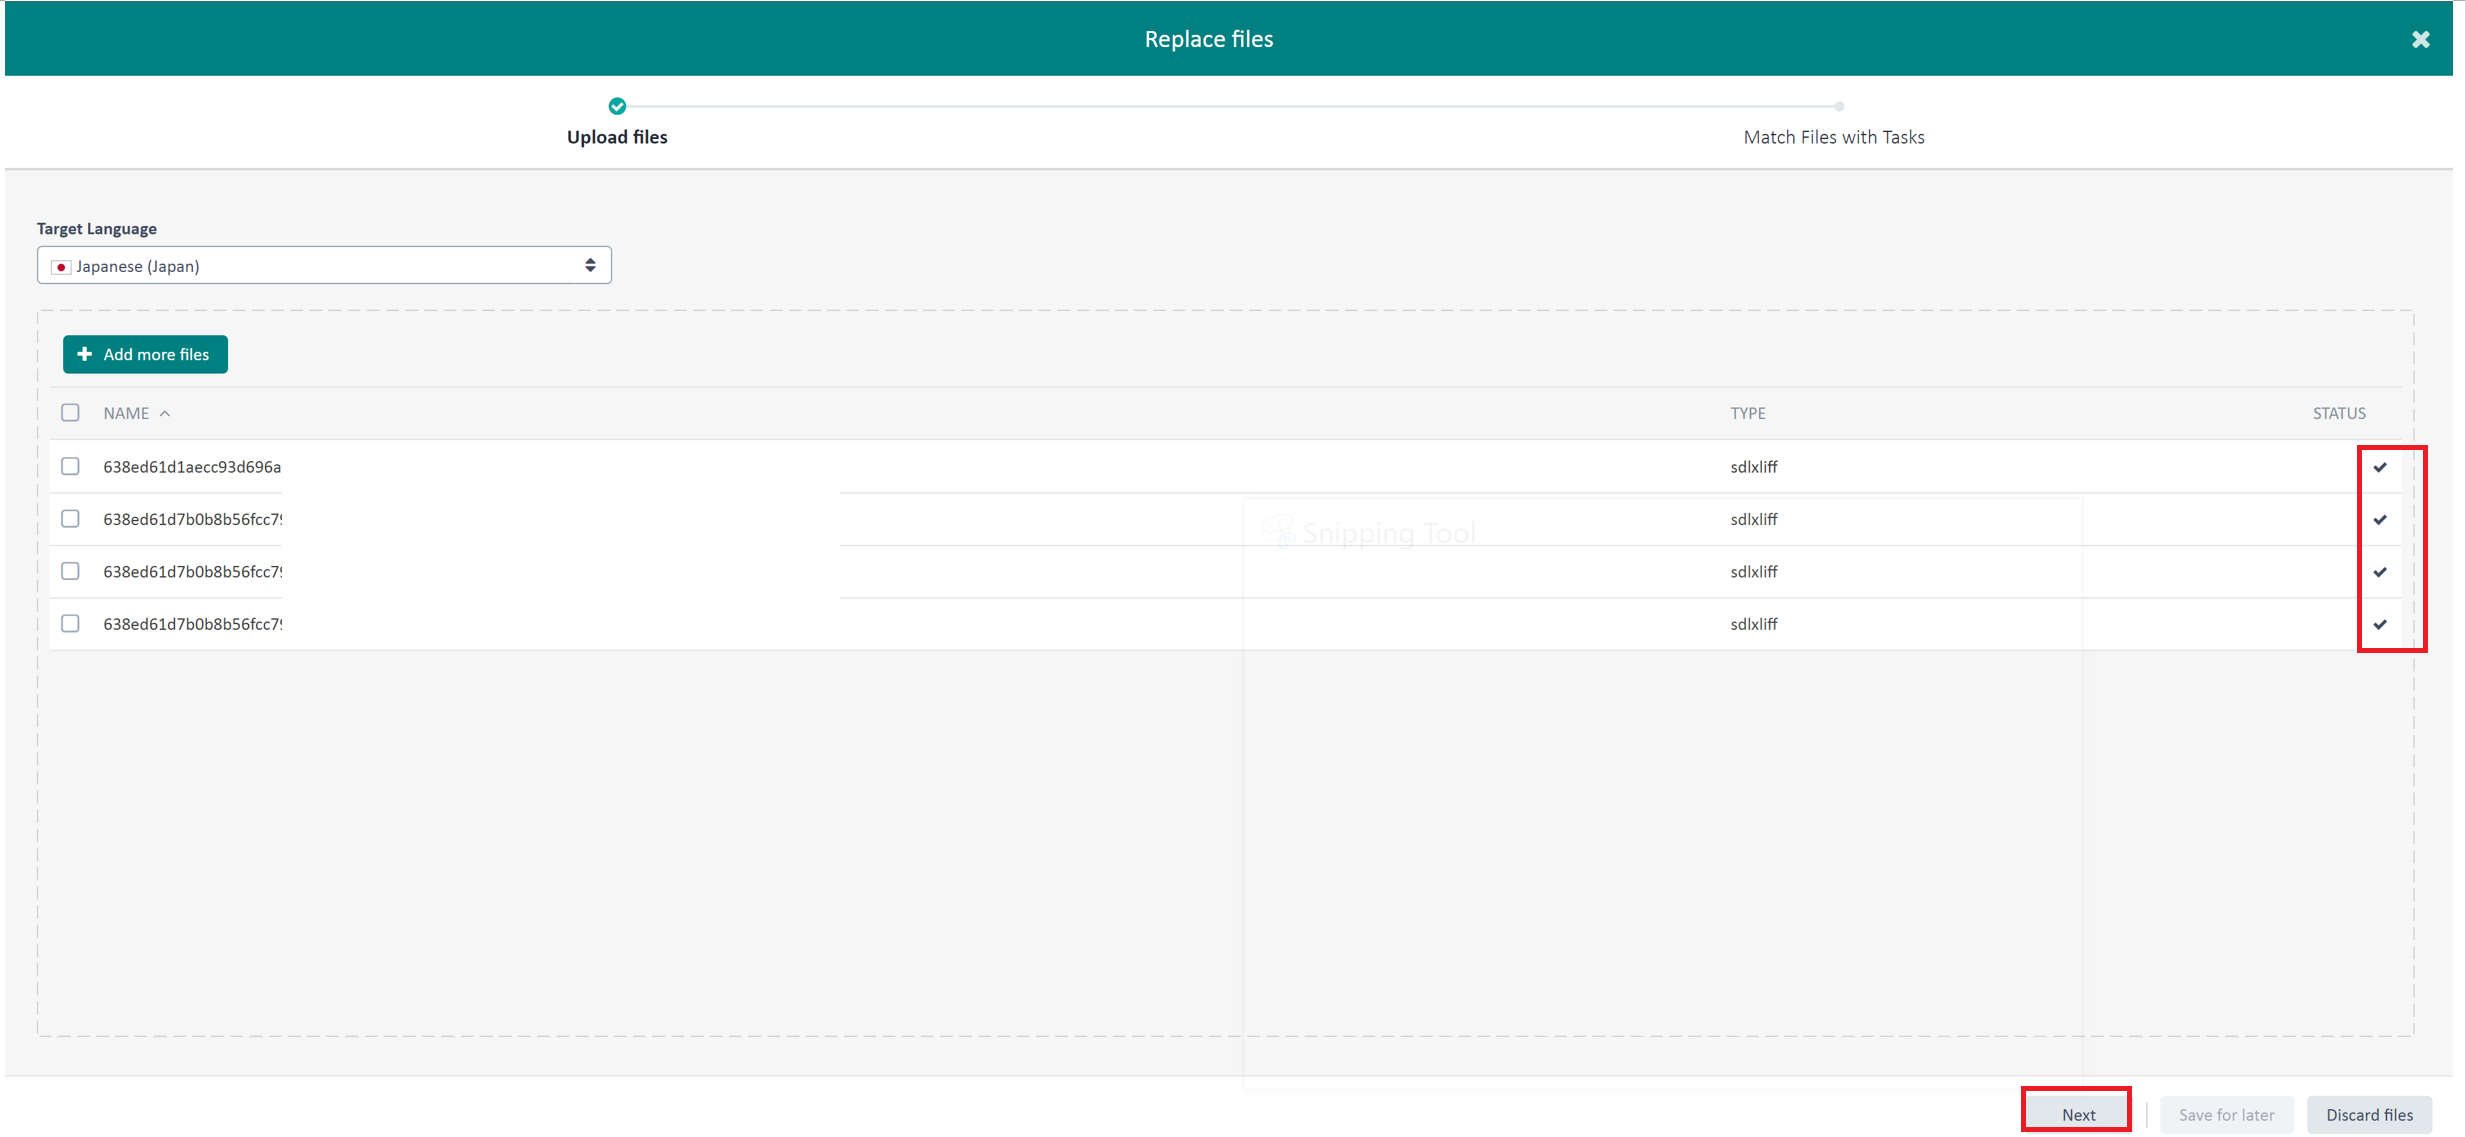
2.Select target language, browse the completed files from local computer.
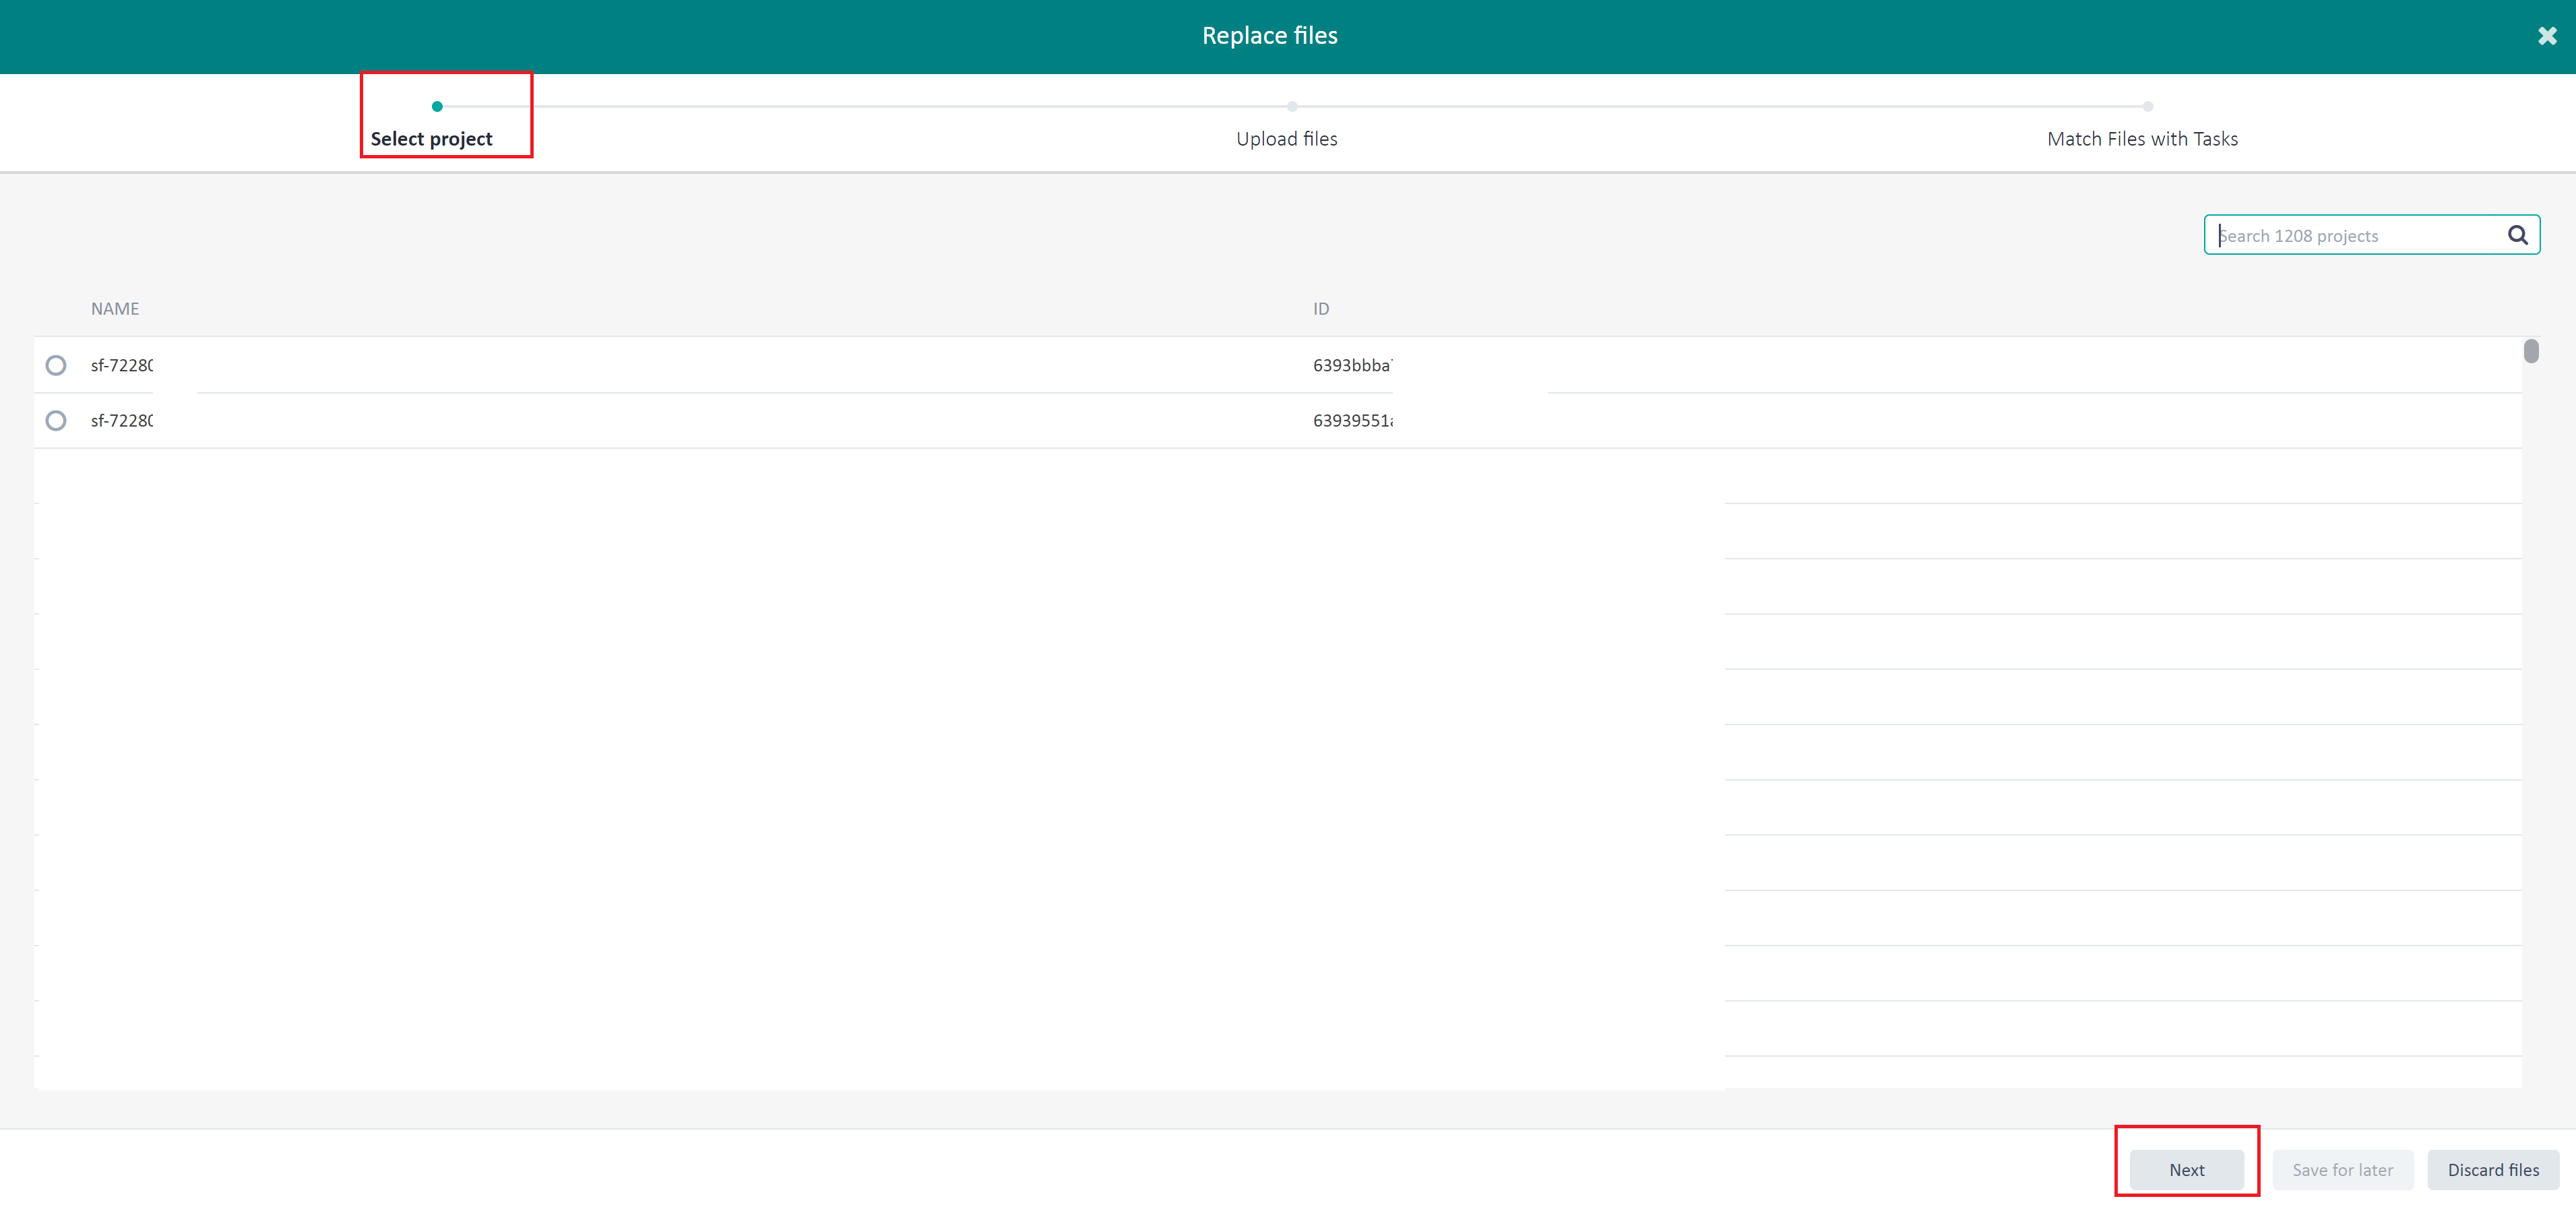
You might see a different page requires you select project first if you didn't select the check box corresponding to the task row in Step1.
Please choose the project name for current task then click Next, procedures will be the same after this step.
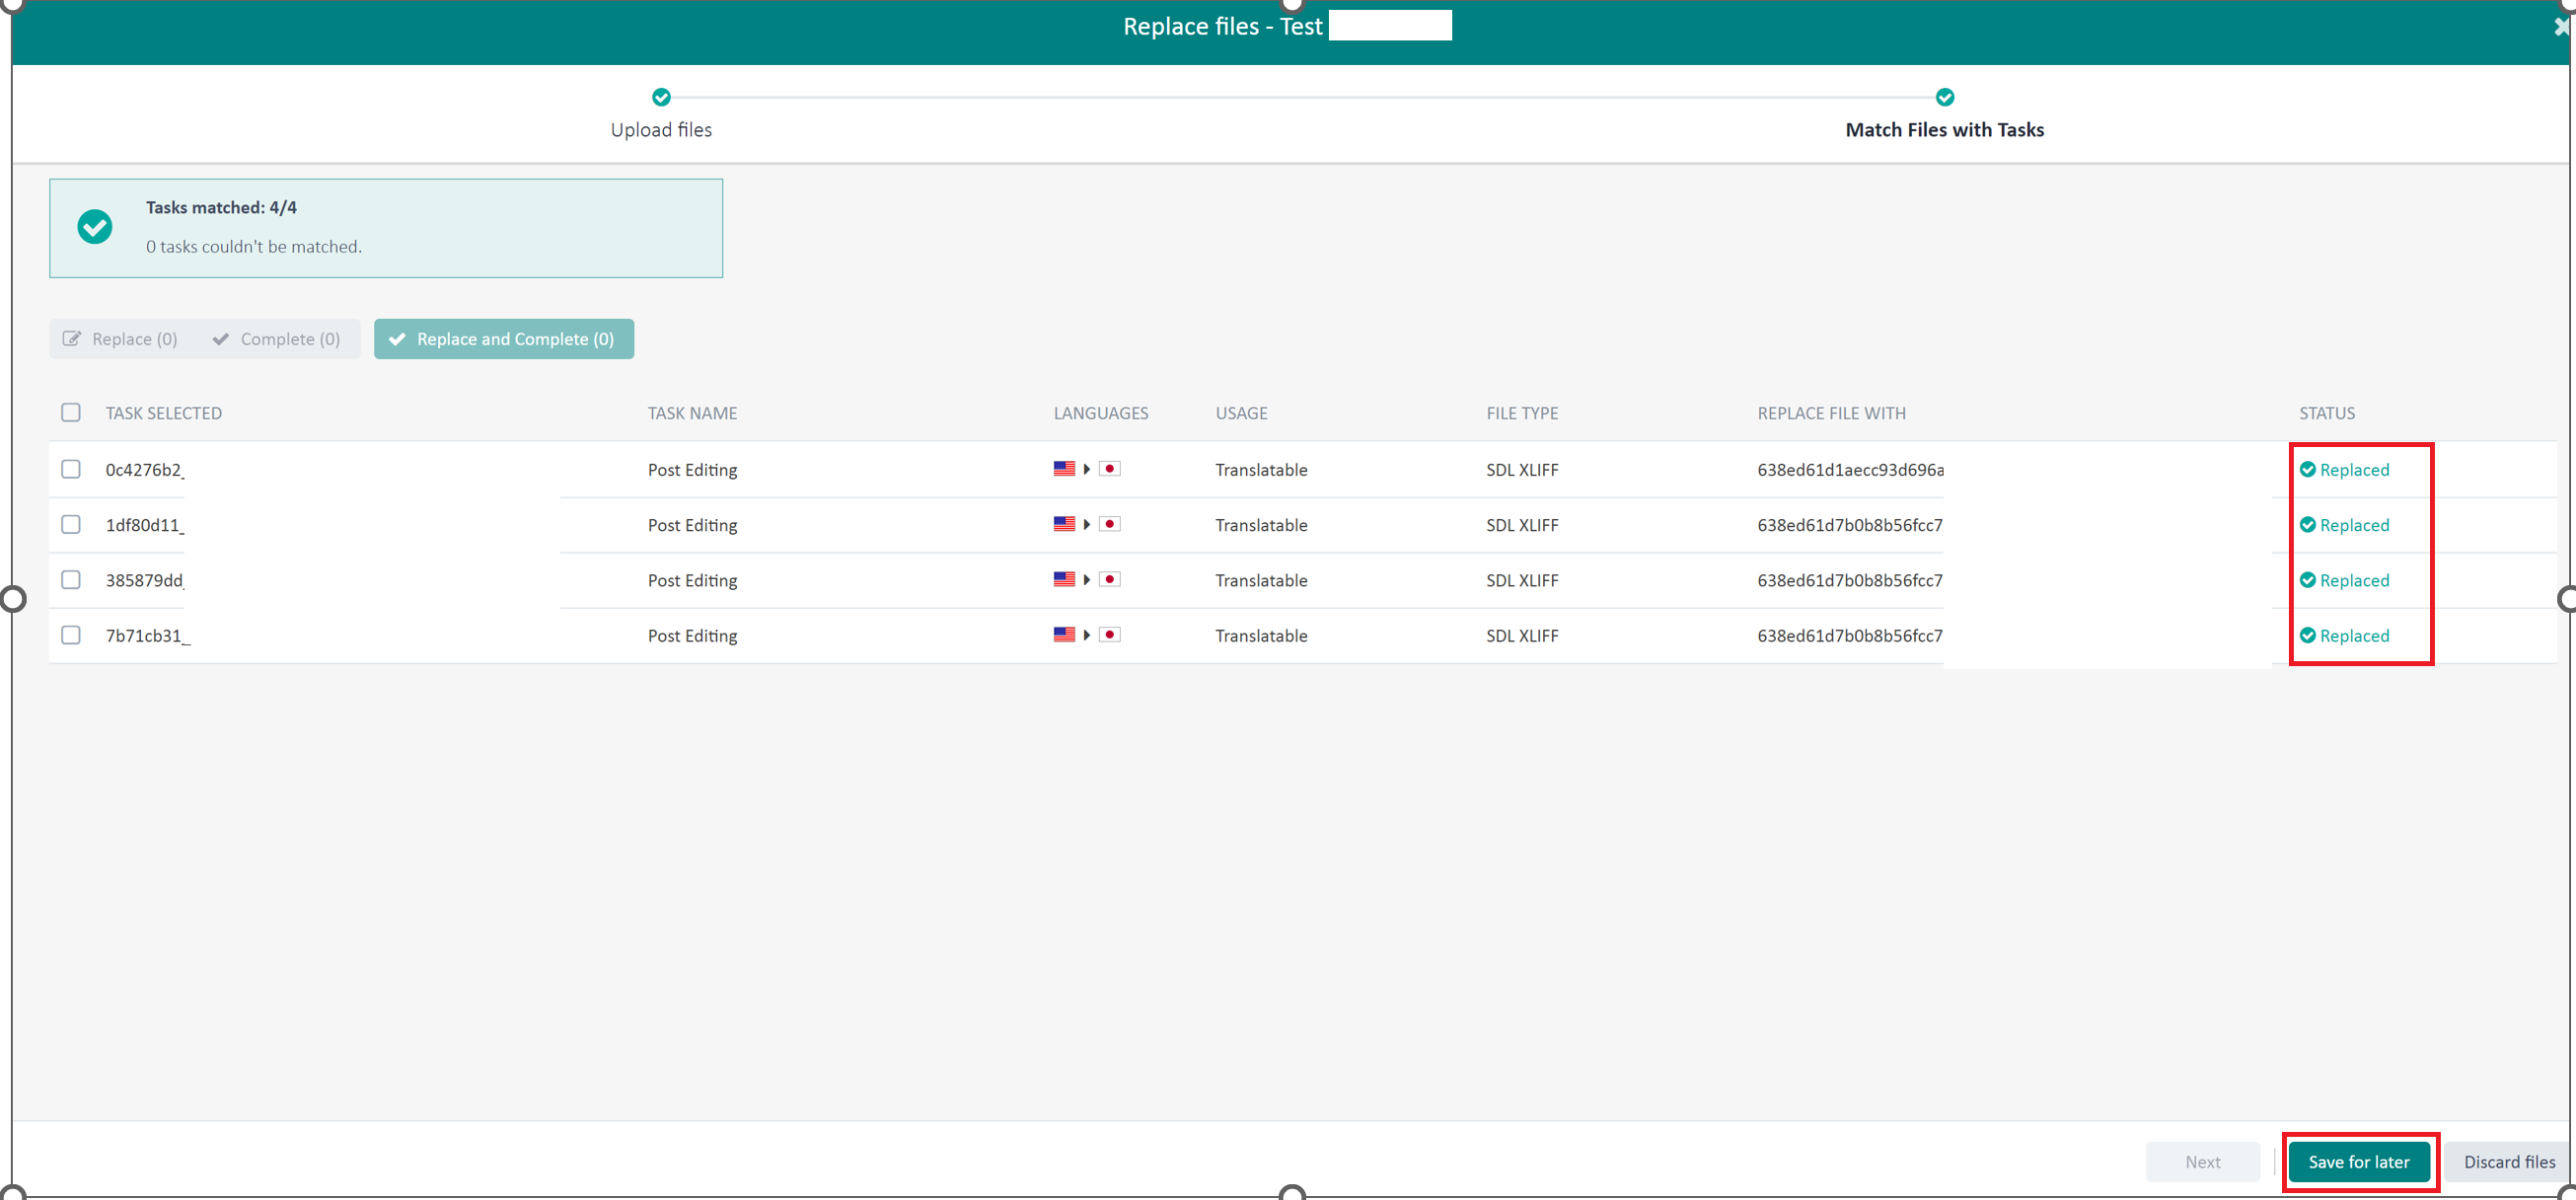
3. when you see the status of sdlxliff files is displayed as “√” icon, Click Next.
4.In page Match Files with Tasks, check the results of the automatic matching.
The files which were matched correctly have the File matched status.
The files for which no match was found have the No match status. Click inside the REPLACE FILE WITH row, and select a file from the list of files which could not be matched.
Wait until the status changes to File matched.
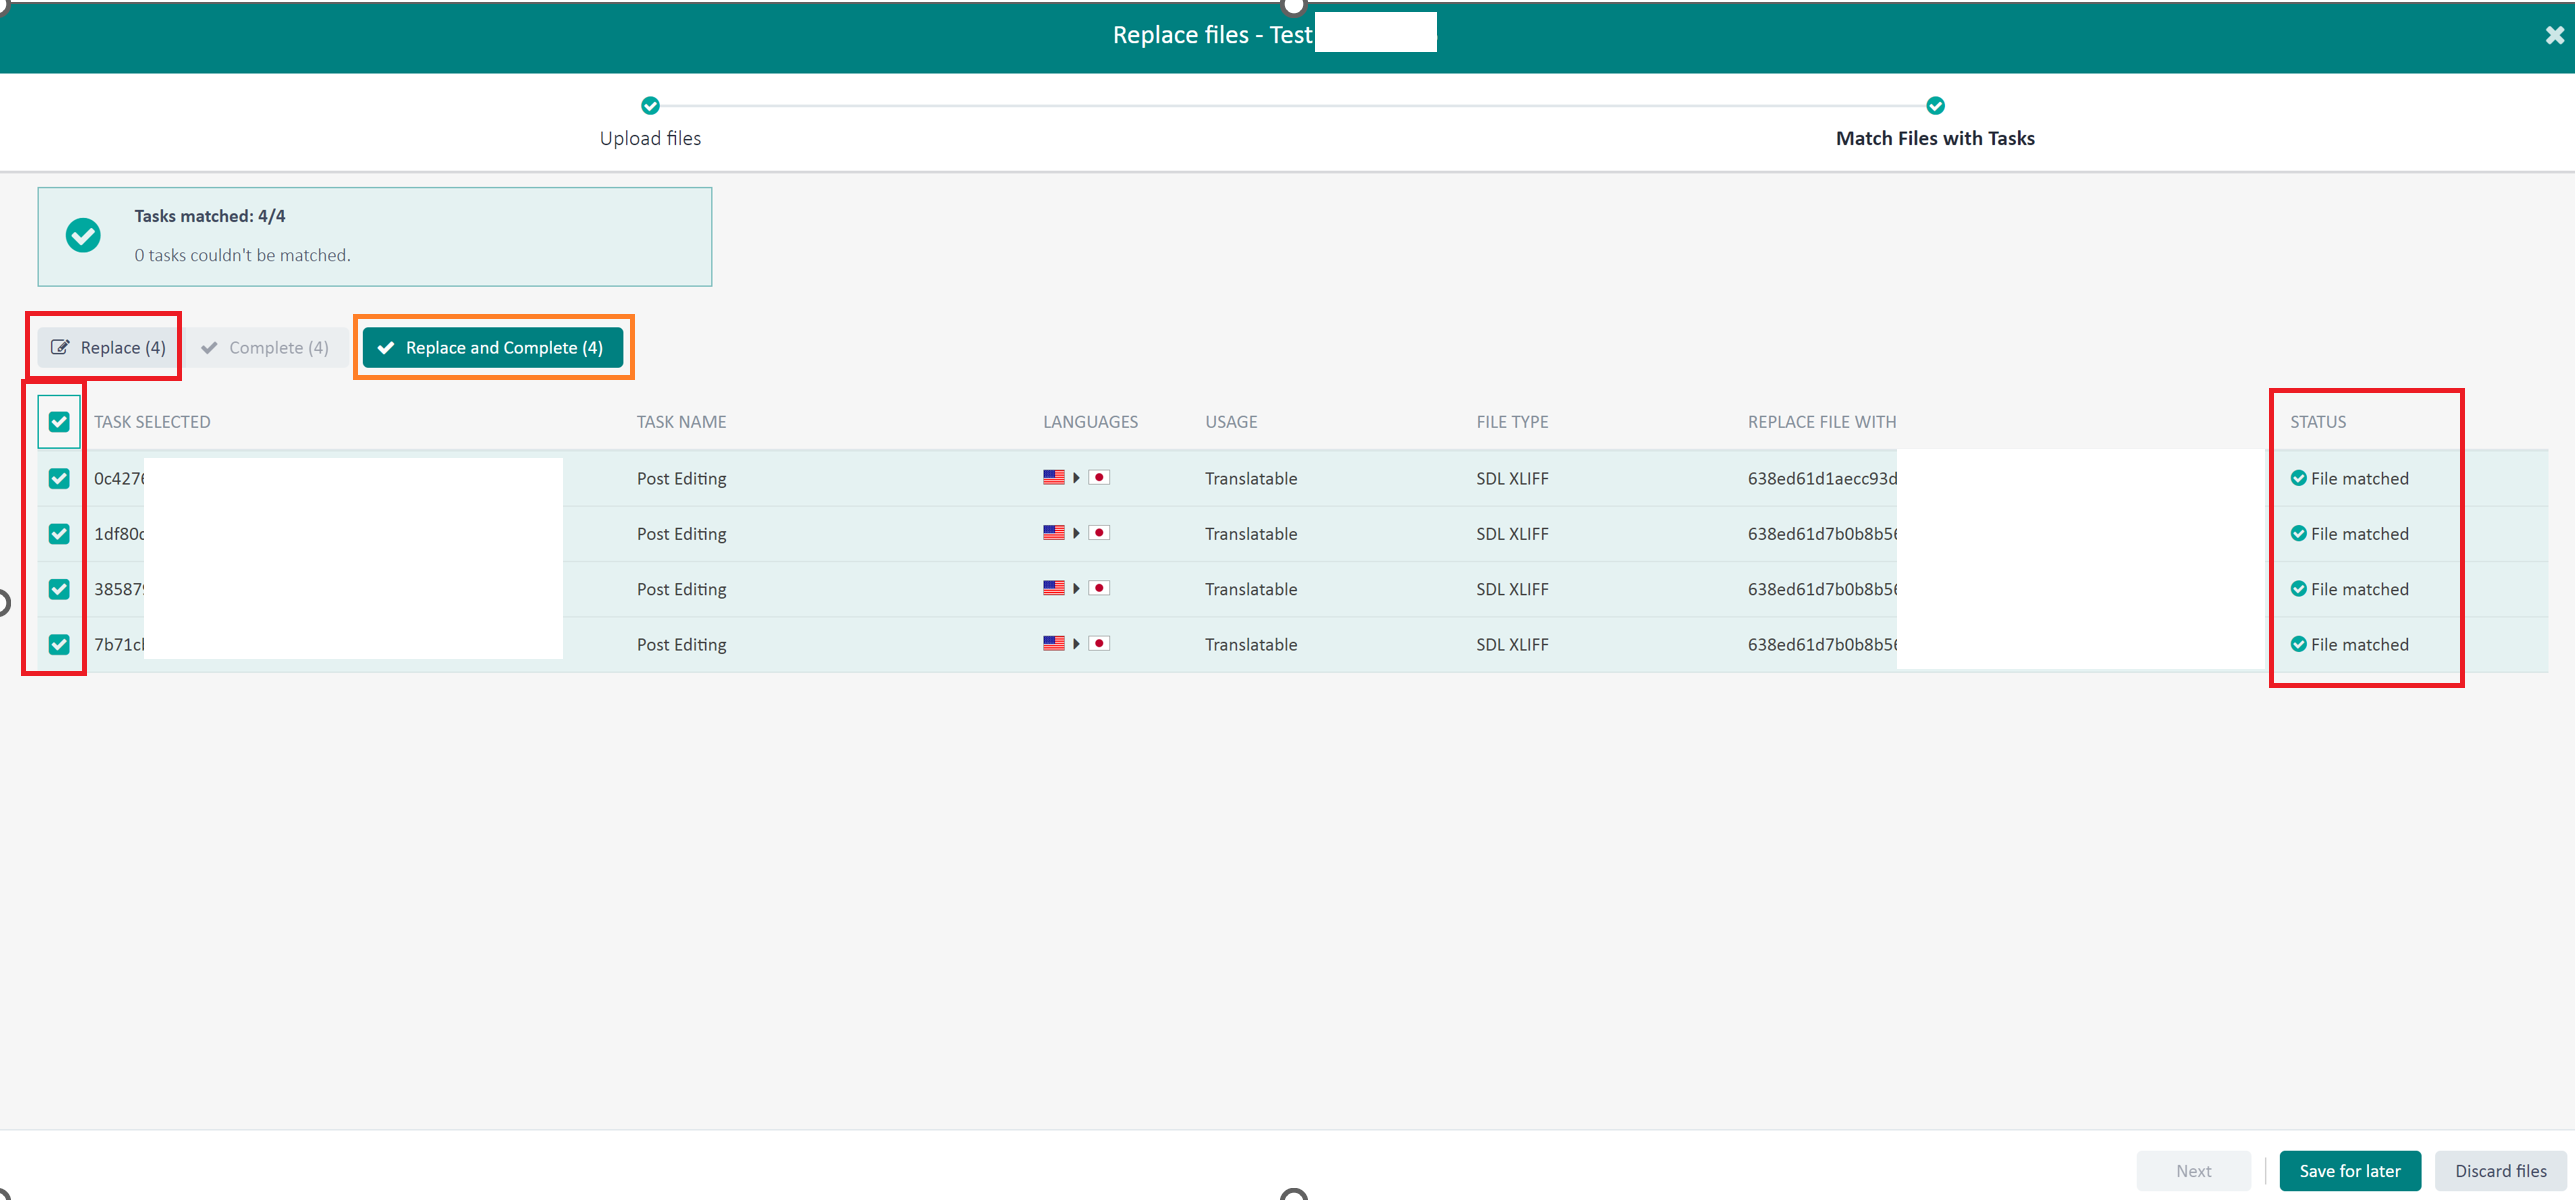
In this step, do not forget to select files and then click "Replace" OR "Replace and Complete"
"Replaced" means you uploaded that translated files back to TE but the stage is not completed, you still can open in online editor to check detail or verify.
"Replaced and Completed" means you uploaded translated files back to TE and also completed the stage allocated with you.
5. Files which were uploaded successfully will have "Replaced" status, click Save for later to close the wizard.
