1. Go to your
Trados Studio cloud capabilities, Trados Team, Trados Accelerate or Trados Enterprise account:
https://languagecloud.sdl.com/2. Select the option
Users in the menu bar - NOTE that the Users tab will only be visible to subscriptions with more than 1 license. For accounts with only 1 license, the
Users menu will not be available
3. In the
Users menu, select the button
New Member:
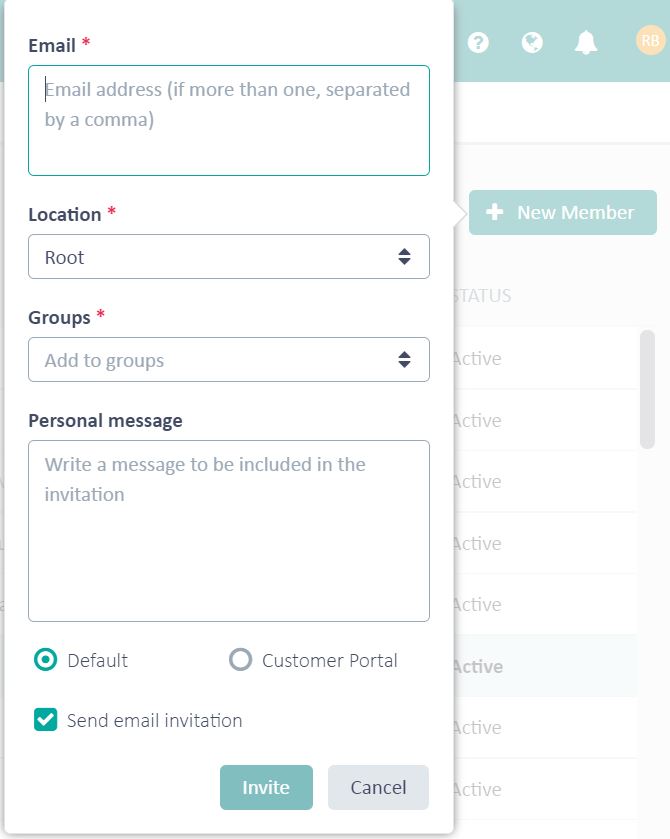
4. In the pop-up window, you can enter the e-mail or e-mails of the users you want to add. If more emails are added at once, separate them by comma ",":
- Enter the valid email addresses of the users you want to invite.
- From the Location list, select the account location where you want to invite your user.
- From the Groups list, specify the Groups in which you want to include the users. See full list of Roles for the groups here: https://docs.rws.com/812699/810176/trados-studio-cloud-capabilities/user-permissions
- (Optional) To send a message along with the invitation, enter the message in the Personal message box.
- Select whether you want the user to log in and be redirected to Trados Team or to Language Cloud Customer Portal (Customer Portal). Note that you should select Customer Portal only if you invite users to the following groups: Customer Requester or Customer Requester Restricted.
- Choose one of the following:
- Send an invitation email straight away, by selecting the Send email invitation check box.
- Do not send an invitation email, by clearing the Send email invitation check box. If you choose this option, you must send users an invitation email later on by following the instructions n this topic. It is useful to postpone the invitation email, if you want to finish setting up resources and projects before users actually have access to the Language Cloud platform.
- Select Invite.

6. The user will receive an e-mail invitation to join the
Trados Account. They need to accept the invitation by following the link in the e-mail.
Once the user accepts the invitation and logs in to
Trados Account, their user account will have the status
Active.
If a user has not accepted the invitation yet, the status will still be
Invited.
As an
Administrator, you have the option to re-send the email invitation in case the user has not received it, or cannot find it.


